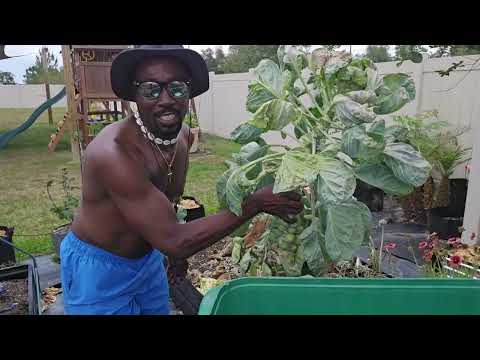
Spring planting is in full swing here at the Urban Suburban Homestead, and these new raised beds are finally getting the love they deserve. In this update, I’m sharing how I approach raised bed gardening with three big tasks: fertilizing the beds, planting squash, and squeezing in even more tomatoes. If you’re growing along with me—whether in a big backyard or your own little gar-deen—I think you’ll find some helpful tips you can use today.
Why Fertilizing Matters in Raised Bed Gardening
One thing I love about raised bed gardening is the control. I get to choose the soil, the drainage, and the nutrients. The trade-off? My plants depend on me to replace what they pull from the soil. In-ground roots can chase nutrients deeper. Raised bed roots can’t.
So before I plant a thing, I always amend and feed the beds first. Well-fed soil gives me stronger transplants, healthier roots, and a better harvest down the road.
Here’s what I focused on this time:
Compost as the foundation. I worked a generous layer of finished compost into the top few inches of each bed. It’s my favorite slow-release nutrient source, and it also boosts soil structure and water retention. Both matter a lot in our Florida zone 9b heat.
A balanced granular fertilizer. For an extra boost at planting, I added a balanced granular fertilizer. This gives my transplants the support they need while they settle in.
Watering it in. Fertilizer can’t do much sitting on top. I watered each bed deeply to help move those nutrients down to the root zone.
Honestly, healthy soil is the foundation of everything else. If I get this step right, my plants reward me all season long. For more on our soil-building approach, visit our Soil, Compost & Fertilizing section.
Planting Squash in the Raised Beds
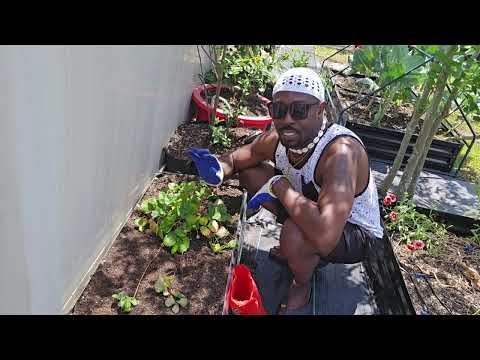
Squash is one of those plants that rewards growers who give it space and good soil. We planted both summer squash varieties in the new raised beds this round, and we’re excited to see how they perform in the amended mix.
Spacing matters. Squash plants are vigorous and sprawling. We gave each plant plenty of room — at least 24 to 36 inches apart — to allow for airflow, which helps prevent the powdery mildew that loves to show up in humid Florida conditions.
Planting depth. We planted our squash transplants so that the root ball was level with the soil surface or just slightly below, then watered them in gently to eliminate air pockets around the roots.
Mulching. After planting, we added a layer of mulch around the base of each plant to help conserve moisture and keep the soil temperature a bit more consistent. In zone 9B, that summer heat can dry out even raised beds surprisingly fast.
One thing to watch with squash is vine borers and squash bugs — both can show up fast and do serious damage. We’ll be keeping a close eye and addressing any pest pressure early before it gets out of hand. Check out our Pest Control & Garden Problems section for how we deal with pests without chemicals.
Adding More Tomatoes 🍅
You can never have too many tomatoes. That’s just homestead law in my book. I added more tomato transplants to the new beds to round out our season.
Variety selection. We focused on varieties that are known to perform well in the heat and humidity of Florida, with an eye toward disease resistance. After losing plants to early blight in past seasons, disease-resistant varieties have become a priority.
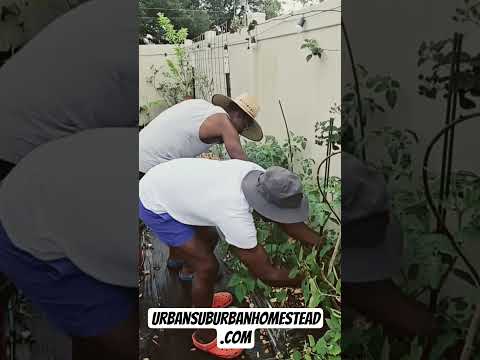
Deep planting for strong roots. Tomatoes are one of the few vegetables that actually benefit from being planted deep — or even sideways in a trench. Every part of the buried stem develops into roots, giving the plant a much larger root system and better anchoring. We made sure to bury each transplant up to its lowest set of true leaves.
Support from day one. We got stakes and cages in place at planting time rather than waiting. Getting support structures in early prevents root disturbance later and means you’re never scrambling to stake a flopping plant.
Consistent watering is key. Tomatoes are sensitive to irregular watering — it’s one of the main causes of blossom end rot and fruit cracking. We’re aiming for deep, consistent watering rather than frequent shallow waterings, which encourages deeper root growth.
The Big Picture: Building a Productive Homestead Garden
Every bed I plant and every scoop of compost I dig in is one more step toward a more self-sufficient homestead. It’s not always glamorous work. Hauling water and shoveling compost in the Florida sun is real effort. But the payoff is so worth it.
This season, I’m trying to make the most of every square foot in these new beds. Between the squash, the tomatoes, and everything else going in the ground, the gar-deen is really coming together.
Watch the full video above to see how I set up and fertilized the beds, and how I got each plant in the ground. If you’re on a similar journey, drop a comment below. I’d love to hear what you’re growing this season! You can also check out our other garden updates for more from the homestead.
Quick Tips Recap for Raised Bed Gardening
- Amend raised beds with compost before each new planting season
- Apply a balanced granular fertilizer at planting time and water it in well
- Give squash plenty of room — 24 to 36 inches between plants
- Plant tomatoes deep to encourage a stronger root system
- Mulch around new transplants to retain moisture and regulate soil temperature
- Get support structures (stakes, cages, Florida weave) in place at planting time — not after
Follow along on our YouTube channel for more real, unfiltered homestead content — the wins, the challenges, and everything in between. Don’t forget to subscribe so you never miss an update from the Urban Suburban Homestead!